Close
About
Capabilities
Properties
COMMERCIAL
RESIDENTIAL & MIXED-USE
HOSPITALITY & PRIVATE CLUBS
News & Press
News
Press
Gallery
Blog
Contact
GET IN TOUCH
CAREERS
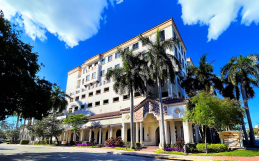
Photography by: ©Michael B. Lloyd
May 30, 2019
0
0
Related Posts
BRANDING, MARKETING & COMMUNICATION ROADMAPS
The Rise of Conversions: Bank Spaces Becoming Retail and Restaurant Locations
Key Considerations for Business Owners When Selecting Office Space in South Florida
Skip to content
Open toolbar
Accessibility Tools
Accessibility Tools
Increase Text
Increase Text
Decrease Text
Decrease Text
Grayscale
Grayscale
High Contrast
High Contrast
Negative Contrast
Negative Contrast
Light Background
Light Background
Links Underline
Links Underline
Readable Font
Readable Font
Reset
Reset
Accessibility
Accessibility
Privacy & TOS
Privacy & TOS